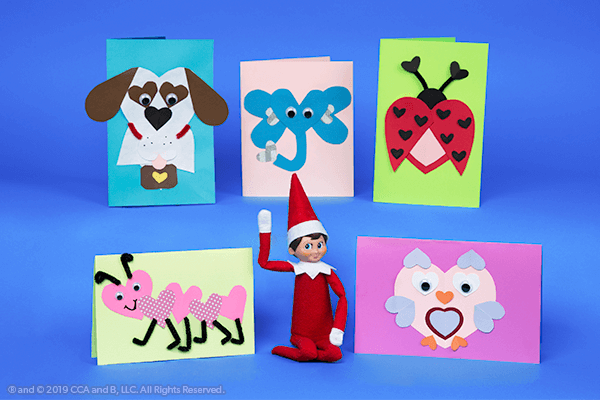
Your friends and family are sure to fall in love with these crafty cards that the Scout Elves dreamed up just in time for Valentine’s Day. Bristly pipe cleaners and goofy googly eyes help these adorable animals pop off the page, while the brightly hued paper creates eye-catching cards friends and family will love to receive.
You’ll Need:
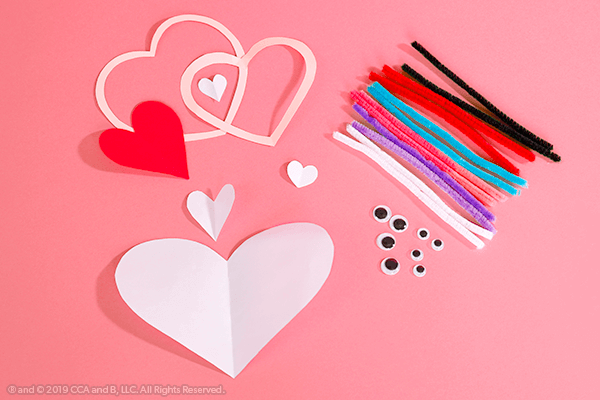
- Construction paper
- Scrapbooking paper
- Heart-shaped stencils or cookie cutters
- Scissors
- Googly eyes
- Pipe cleaners
- Glue
- Marker
Instructions:
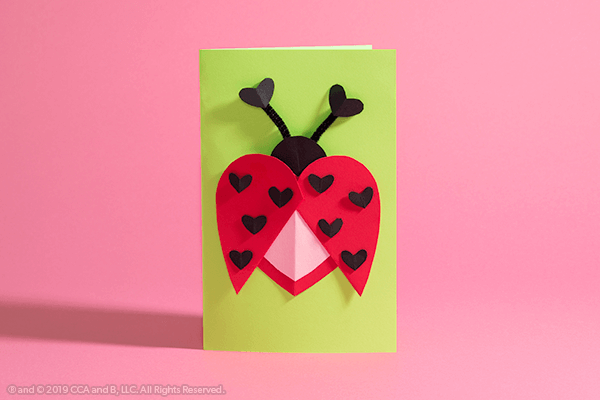
- Cut out one medium-sized red heart, and cut it in half. Lay pieces to the side.
- Cut another medium-sized red heart.
- Cut one pink heart that is slightly smaller than the second red heart. Glue the pink heart to the red heart, leaving a quarter of an inch border.
- Cut ten miniature black hearts to use as the ladybug’s spots and at the top of the antennae.
- Cut one black circle for the ladybug’s head.
- Using a piece of construction paper as the base, glue together all the pieces of the ladybug as shown, starting with the pink and red hearts that are glued together.
- Place the black circle in the crevice at the top of the heart.
- Slightly angle the two halves of the red heart outward to create the ladybug’s wings.
- Glue on the black mini hearts on your ladybug’s wings, saving two for the top of the antennae.
- Glue two short pipe cleaners to the top of the ladybug’s head to create antennae, and top them with the remaining two mini black hearts.
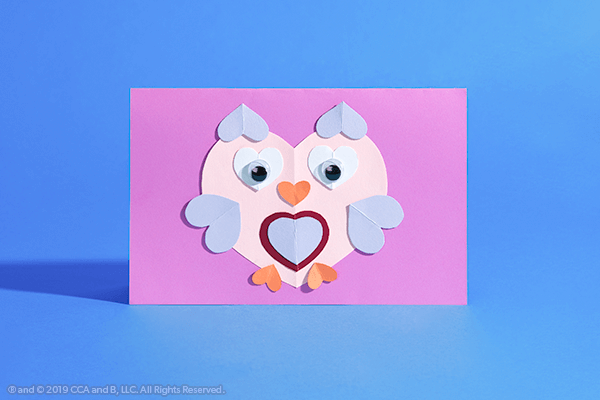
- Begin by cutting out all of the hearts you will need. For the owl’s body, you will need one large pink heart. You will need two small white hearts for the owl’s eyes; two hearts of the exact same size in purple to put on top of the owl’s head; three slightly smaller orange hearts and three medium-sized purple hearts. The medium-sized purple hearts will form the owl’s wings and tummy. FInally, cut one final heart that is slightly larger than your medium purple hearts. This will be the base of the owl’s tummy.
- Once you have all of your hearts cut out, assemble them on a piece of construction paper, using the picture of the finished valentine as a guide for where to place each heart.
- When your owl looks how you want it to, add two googly eyes to complete it!
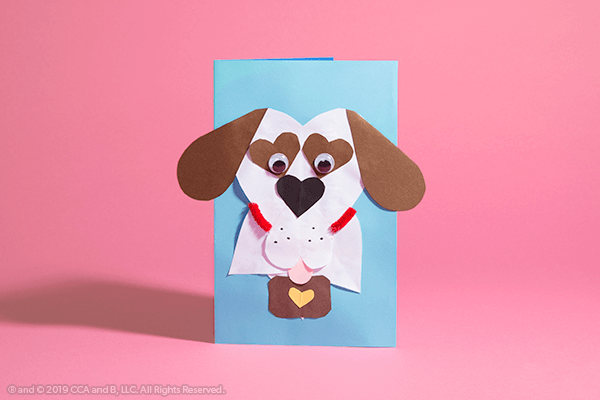
- Out of white construction paper, cut out one large heart, and a second heart that is approximately 1/3 the size of the original heart (for the mouth). Looking to the picture of the finished valentine as a guide, cut out a gumdrop-shaped piece of white paper to form the pup’s shoulders.
- Out of brown construction paper, cut two medium-sized teardrop-shaped ears, two small hearts (eyes) and a frustum-shaped barrel that will hang around the Saint Bernard’s neck.
- The final two pieces of paper needed are a small rounded tongue out of pink paper and a small yellow heart for the puppy’s barrel.
- Using the picture as a guide, assemble your Saint Bernard. Start by gluing the pup’s shoulders to a piece of construction paper, then glue the large white heart on top to form the pup’s head.
- Once you have glued on the ears, brown heart eyes, black heart nose, upside-down heart mouth, barrel (with heart) and tongue, add googly eyes and several black dots on the pup’s mouth.
- To make your pup look just like the Elf Pets® Saint Bernard, use two red pipe cleaners to create a collar.
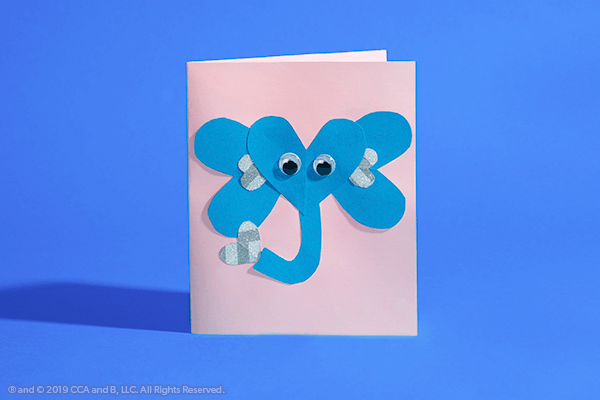
- Cut out three identically sized blue hearts.
- Cut one j-shaped trunk out of the same paper.
- Cut three identically sized hearts that are approximately 1/4th the size of the original blue hearts. Helpful hint: The Scout Elves used a patterned paper for these small hearts, but you can use any color you like!
- Glue two of the mini hearts to the middle of two of the blue hearts.
- To assemble the valentine, start by gluing the two blue hearts with mini hearts attached to a piece of construction paper. The pointed ends of the hearts should face each other. Place the hearts far enough apart so that the third blue heart can sit in the middle to form the elephant’s face.
- Glue the last blue heart in the middle of the two blue hearts.
- Tuck the top of the J-shaped trunk under the bottom point of the plain blue heart to form a trunk.
- Glue googly eyes to the plain blue heart and add the final mini heart at the end of the elephant’s trunk.
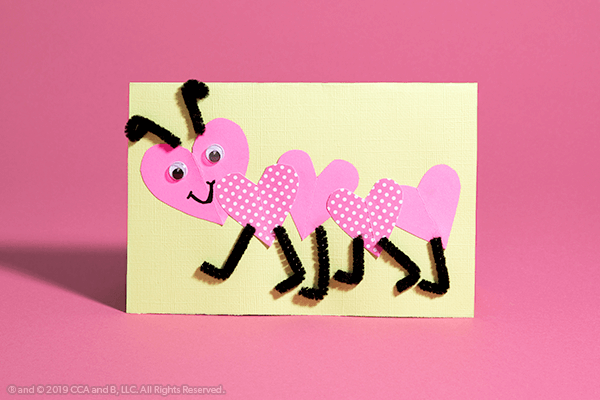
- Pick two similar, but slightly different colors of construction or craft paper for this cute caterpillar, and create two small- to medium-sized hearts out of each.
- Pick one of the colors for the caterpillar’s head, and cut one heart slightly larger than the rest out of that paper.
- Start by gluing the bigger heart at one side of the paper.
- Using the picture as an example, glue the remaining hearts in a row, tilting the hearts slightly in different directions to create the caterpillar’s body.
- Use pipe cleaners (approximately 1 inch long) to create legs and antennae for the little bug.
- Finish your caterpillar with googly eyes and a drawn-on smile!
Pro tip: Have some Valentine’s Day cookies on hand for a valentine decorating party.
Please remember that when attempting the craft included in this blog post, children should always be supervised by an adult. When using crafting supplies or products, always read manufacturer’s instructions and warnings.