It’s no secret that the Scout Elves are huge fans of the Tooth Fairy’s work rewarding good boys and girls all over the world. When your little one’s tooth starts to wiggle, reach for a few simple supplies to create this DIY Tooth Fairy Tote, a bag that will make it easy for the Tooth Fairy to find your children’s bygone baby teeth and leave behind a reward for them to find the next morning!
You’ll Need
- Piece of colored felt
- Piece of white felt
- Small square of adhesive hook and loop fastener
- Fabric glue
- Googly eyes
- Black marker
Instructions
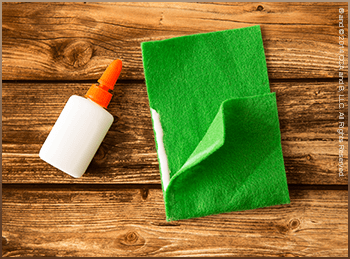
- Cut a piece of colored felt into a 4″ x 10″ rectangle.
- Fold the rectangle in half, leaving one side of the fabric approximately 2 inches longer than the other. The
excess fabric will become part of a fold-over flap that will keep your children’s teeth secure until the Tooth
Fairy is able to retrieve them!

- Glue the sides of the satchel shut, leaving the extra 2 inches of fabric untouched. Helpful hint: Place a heavy
book on top of the felt to hold it in place as it dries.
- After the glue has dried, use an iron to smooth down the extra fabric into a flap that folds over the open part
of the bag.
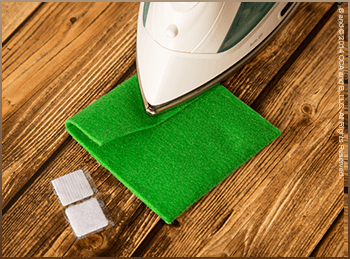
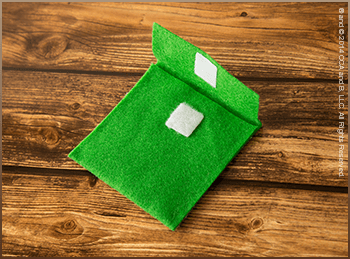
- Attach a small square of adhesive-backed hook and loop fastener to keep the flap closed.
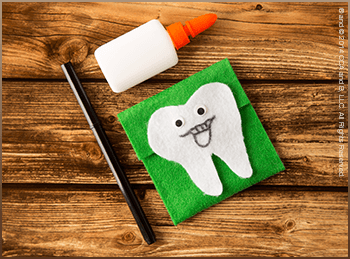
- Cut a tooth shape out of white felt, and glue it to the flap of the bag, making sure to not accidentally glue the bag shut.
- Now it’s time to decorate! Glue googly eyes onto your tooth, and draw on a smile!
- As soon as your child’s tooth falls out, ask him or her to put it in the bag and leave it under a pillow or somewhere else the Tooth Fairy can easily find it. The next morning, they will find their tiny tooth swapped out for a special surprise!