
Share this idea
Get Printable
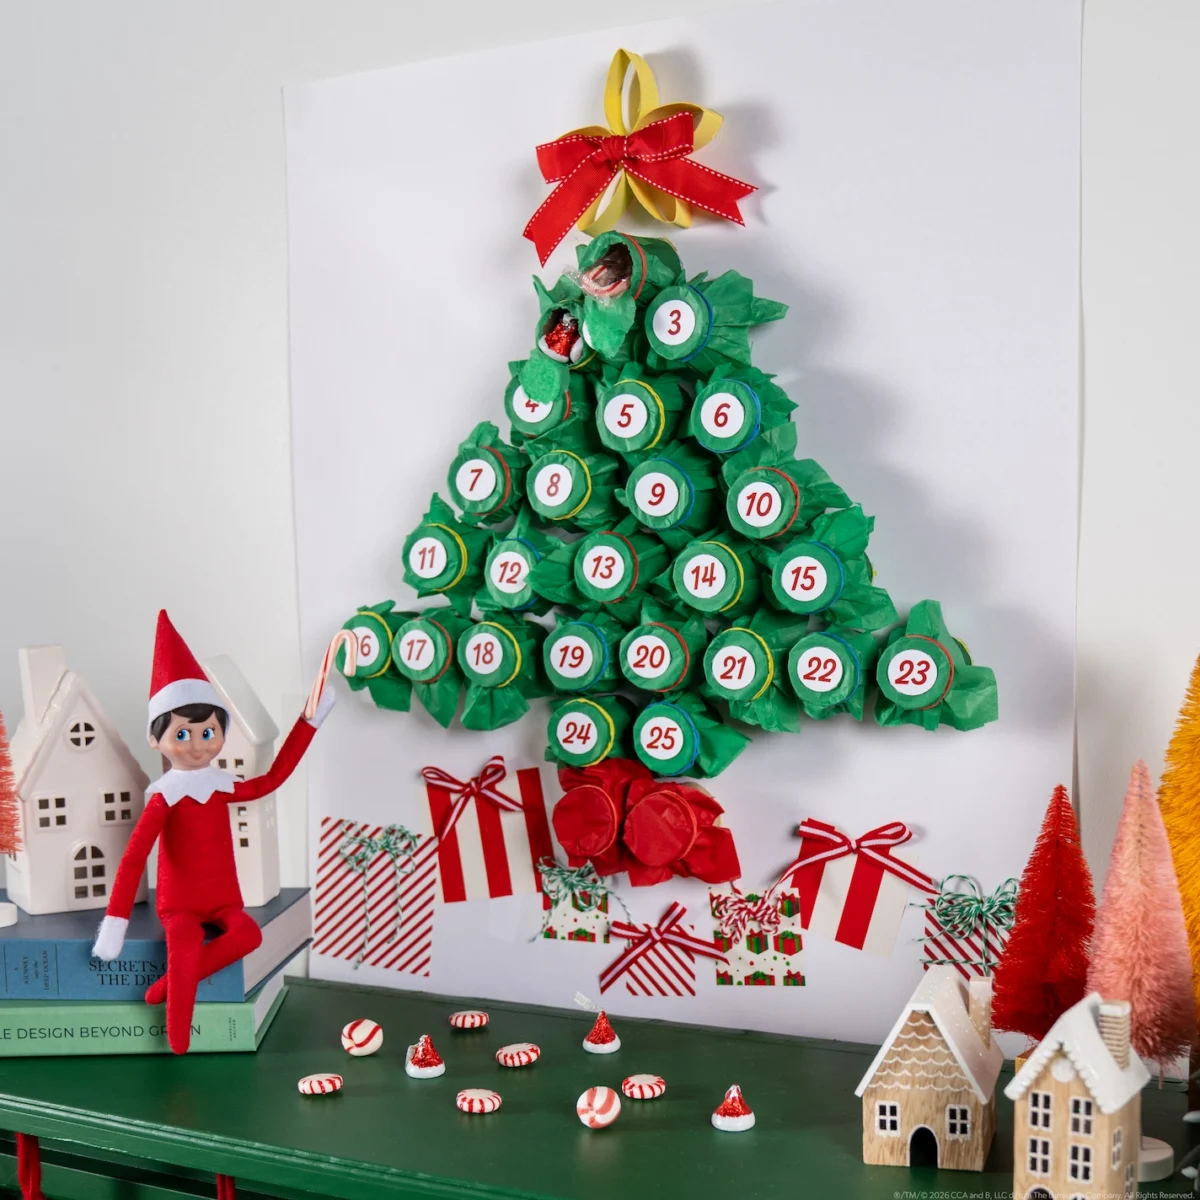
DIY Christmas Tree Advent Calendar
An upcycled advent calendar full of tiny surprises.
Materials:
- Empty toilet paper or paper towel rolls
- Green and yellow acrylic paints
- Paintbrush
- Scissors
- 25 green and two red tissue paper squares
- Rubber bands
- Posterboard
- Ribbon and/or bows
- Wrapping paper scraps
- Hot glue
- Tiny treats, such as mini toys or candies
- Printable
Instructions:
- Your Scout Elf will cut the empty rolls into 3” sections and then paint them green. They will need 25 sections to mark the days until Christmas, plus two sections for the trunk of the tree.
- Your Scout Elf will also cut five sections and paint them yellow to create a star for the top of the tree.
- After the paint dries, your elf will arrange the 25 green rolls into a tree shape and two green rolls into a trunk shape atop the posterboard, then carefully glue the rolls into place. They will flatten the yellow sections slightly and then glue in place above the tree in the shape of a star.
- Your elf will fill each roll on the tree shape with a tiny treat before using the rubber bands to secure the tissue squares to the tops of the rolls.
- Next, your Scout Elf will cut the advent numbers from the printable and glue each number, in order, to the tissue toppers.
- To finish the scene, your Scout Elf may cut gift shapes from wrapping paper and ribbons.
- They will hang the posterboard on the wall for you to find.
- Each morning, you will use your finger to poke open the appropriate day on the calendar and find a tiny treat inside.
- When you reach December 25, it’s finally Christmas Day!


